Best Practices
All of this is setup on Cloudflare ( CF ).
Webflow Configuration Starting Point
Before you begin, we're assuming the following configuration on Webflow;
- Your site has a hosting plan, and a custom domain.
- You have a default domain set.
- You have SSL switched on.
- Your site is currently published to your custom domain, with the above settings.
From this starting point, we'll make the changes below.
If you have multiple custom domains configured on your site, and one of them is set as the primary / default domain in Webflow, then you only need to do the configurations below for that default domain.
STEP 1: Setup Cloudflare as your DNS
If your DNS is not currently on Cloudflare, your first step is to change it by setting up Cloudflare's DNS and then updating your nameservers at your domain registrar.
Cloudflare makes this process incredibly easy.
NOTE: you do not need to move your domain to Cloudflare, keep it with your preferred domain registrar. It's the nameservers that will change.
- Create a CF account, if you don't have one.
- Add your domain, scroll down until you see "free" plan if you want to start there.
- Add your DNS to CF
IMPORTANT: Cloudflare will automatically pick up most of the records from your previous DNS however we have seen it occasionally miss some TXT records. Be sure to visually match and add those records to Cloudflare's DNS if they're missing before you take your old DNS offline.
If your previous DNS supports it, it's also a good idea to save a copy of your DNS settings to your hard drive as a backup for reference.
Once you have verified Cloudflare's DNS fully matches;
- Update the nameservers for your domain at your domain registrar, to the new ones provided by Cloudflare.
See this lesson for a video walkthrough
https://www.sygnal.com/lessons/using-cloudflare-dns
STEP 2: Adjust the CF DNS & SSL to a Reverse-Proxy Config
In this step, no changes will to be made to your Webflow site settings. Everything you do will be in Cloudflare directly.
You'll update these three Webflow DNS records in CF, as follows;
- A - 104.156.81.229 - Proxied
- A - 23.235.33.229 - Proxied
- CNAME - www - proxy.webflow.com - Proxied
After changing each, make sure to save each of these items. After you are done, you'll see the changed records, and the Proxied indicator will be orange next to each of them.
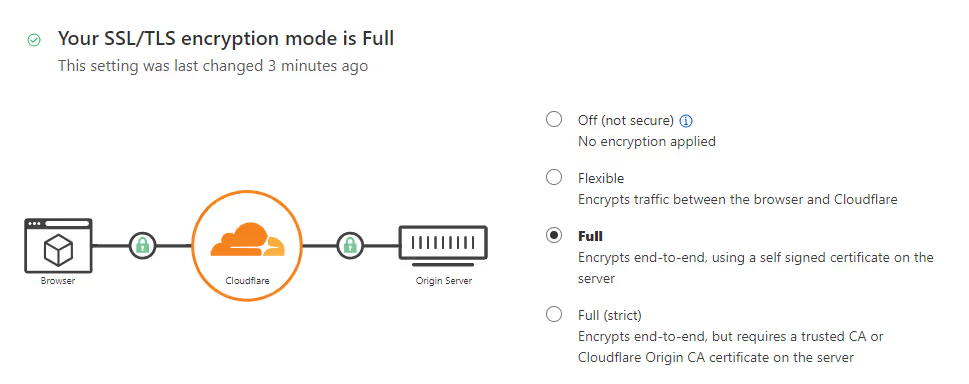
Then, in Cloudflare, you'll go to the SSL/TLS overview and set the encryption mode to Full.

Here's a video walkthrough-
STEP 3: Setup Caching and Asset Optimization
After completing step 2, your site is reverse proxied! However you are not yet doing anything with your new superpowers.
In the lessons following, we'll walk through the caching and asset optimizations you can do.
Notes
Is using Cloudflare's Nameservers & DNS necessary?
In the reverse proxy setup we've outlined here, Cloudflare must be able to proxy the DNS records relating to your website.
On paid Cloudflare plans beginning with the Business plan is a possibility for partial DNS support.
In theory this could allow the use of a different nameserver / DNS, and just have specific entries handled by Cloudflare.
However this comes at a substantial monthly cost. Cloudflare's Business plan is $200/mo. For most project, a full DNS transfer makes far more sense economically.
Testing Notes
- Verified to work with ?edit
- Verified to work with localization
- Verified to work with User Accounts
Not tested
- E-commerce
Research
Non-primary domain options


